Keg Smash
Your key Energy spender. Use it on cooldown and avoid starving yourself of Energy before it becomes available.

Fast-reference tank guides for Midnight Season 2. Current quickviews: Brewmaster Monk, Blood Death Knight, and Protection Paladin.

/uploads/wow/brewmaster-banner.png
Copy the build directly into World of Warcraft, or use the full build image as a visual reference.
Your key Energy spender. Use it on cooldown and avoid starving yourself of Energy before it becomes available.
Press on cooldown. It helps maintain Shuffle and acts as the anchor around which the rest of the rotation flows.
Core AoE rotational button and an important part of the Season 2 tier-set loop with Keg Smash.
Removes part of your current Stagger pool. Avoid wasting charge regeneration and favor use after larger damage spikes.
Your active defensive brew. Use for planned damage or when you need an additional layer of mitigation.
Major offensive/defensive cooldown. Generally use often, briefly delaying only when a pull or damage window makes sense.
Do not sit capped at two charges; purify after meaningful spikes.
Use proactively for planned damage rather than only as a panic button.
Strong burst and threat tool; generally send it early in meaningful pulls.
Use frequently when the target or pull will live long enough to benefit.
Your large defensive for the heaviest incoming damage.
Keep it cycling to maintain Shuffle and trigger Blackout Combo.
Use on cooldown; always keep enough Energy available for it.
Use in your normal cadence and to set up the Season 2 tier interaction.
Your primary spare-Energy filler; especially valuable with Blackout Combo.
Situational AoE filler. Do not let it prevent your next Keg Smash.
Item level and primary defensive stats usually matter more than forcing a perfect secondary-stat distribution.
Breath of Fire primes your next Keg Smash, causing that Keg Smash to explode for additional Flamestrike damage.
The empowered Keg Smash makes affected enemies take 8% increased Physical damage and leaves a damaging fire patch for 5 seconds.
Practical loop: Breath of Fire → consume the Hot Potato effect with your next Keg Smash.
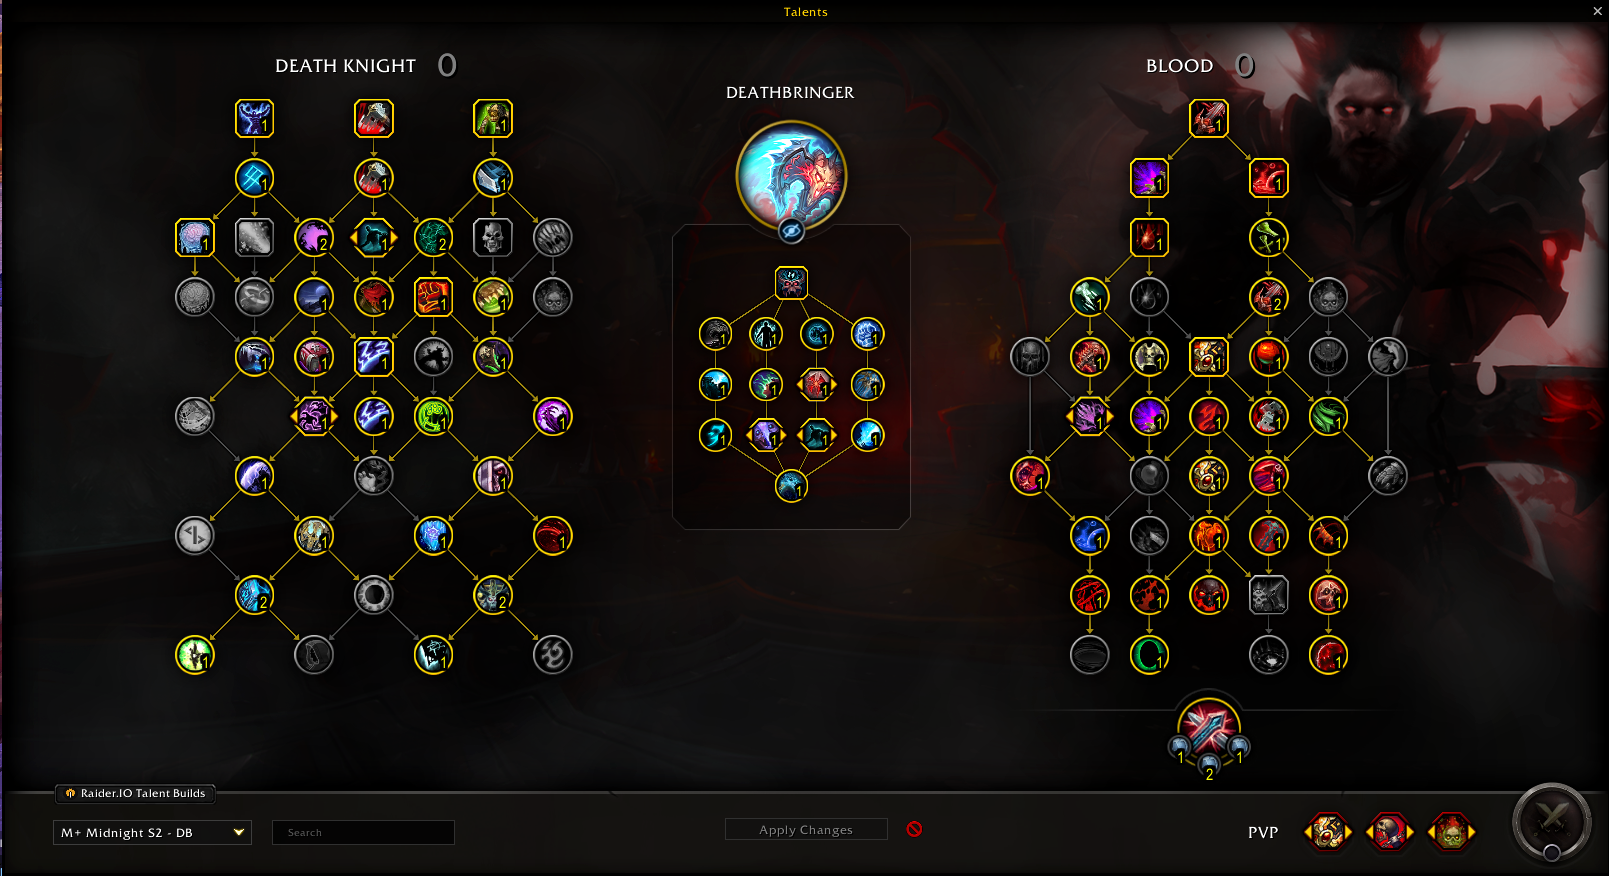
/uploads/wow/blood.png
Copy the build directly into World of Warcraft, or use the full build image as a visual reference.
Your defining Runic Power spender. It deals damage, heals based on recent damage taken, and creates Blood Shield.
Your main Rune spender. Use spare Runes here to generate Runic Power, with additional cleave while standing in Death and Decay.
Generates Bone Shield charges. Use it to maintain your defensive baseline rather than overcapping charges.
AoE Shadow damage that applies Blood Plague. Keep charges cycling and use it to establish threat on grouped enemies.
Ground effect that enables stronger Heart Strike cleave. Crimson Scourge procs give you natural opportunities to place it.
Major throughput and defensive cooldown. It mirrors key attacks and greatly improves your ability to stabilize a pull.
Keep it moving through the dungeon; delay only when gathering or when the next dangerous window is imminent.
Use proactively to increase maximum health and healing received during dangerous damage.
Use against magic damage and magic debuffs; it is often stronger when planned than when reacted to late.
Large all-damage reduction and stun immunity for dangerous moments.
Do not blindly spam. Preserve enough Runic Power to answer incoming damage while avoiding resource overcap.
Use when you need the healing or when Runic Power is getting high (around 75+).
Keep at least 5 charges whenever possible; use Marrowrend to restore charges.
Keep Blood Plague applied and avoid wasting available charges.
Use Crimson Scourge procs and fight inside it when you want Heart Strike cleave.
Spend spare Runes to generate Runic Power and keep your resource engine moving.
Hero Talent choice changes your secondary-stat preference. Sim your character when comparing close upgrades.
Season 2 strongly favors Venomous Abyss trinkets. A common setup is one active/on-use option paired with a passive proc trinket.
Death Strike grants Blood Debt, increasing total Strength by 0.5% per stack up to 10. At 10 stacks, Marrowrend consumes them and grants 10% Strength for 10 seconds.
Consuming Blood Debt grants 3 additional Bone Shield charges and triggers a large burst of damage to your target and nearby enemies.
At 10 Blood Debt stacks, consume the effect deliberately. In Mythic+, banking the proc between packs can be valuable when the next pull is close.
/uploads/wow/protection-paladin.png
Copy the build directly into World of Warcraft, or use the full build image as a visual reference.
Your primary Holy Power spender. Deals Holy damage and increases your armor, making it a central part of staying durable.
A high-priority Holy Power generator. Keep it on cooldown as much as possible for both resource generation and damage.
Creates your core ground effect. Season 2 tier bonuses make Consecration even more important to your regular damage loop.
Ranged shield throw that hits multiple targets. Excellent for threat, interrupts, and filling gaps between Holy Power generators.
A reliable Holy Power generator. Keep charges moving so you do not waste recharge time and use it to support your defensive rhythm.
Your major self-heal and emergency Holy Power option. Use it when healing value outweighs another Shield of the Righteous.
Use proactively for dangerous physical or mixed damage. It is one of your most flexible defensive cooldowns.
Your major damage-reduction cooldown for the heaviest tank hits or sustained danger.
Convert Holy Power into healing when you need immediate stabilization rather than additional armor.
Powerful immunity with encounter-specific uses. Plan around tank mechanics and threat when using it.
Provides offensive and defensive value. Use frequently while aligning it with meaningful combat windows when practical.
Use on cooldown unless a short delay lines it up with an important damage or survival window.
Keep Judgment on cooldown to generate Holy Power and maintain strong rotational throughput.
Spend at roughly 3–5 Holy Power and avoid overcapping. Maintain its armor benefit during active tanking.
Keep charges cycling and use it as a primary Holy Power generator.
Fill open globals with Avenger's Shield and keep Consecration active where you are fighting.
Protection Paladin's secondary stats are relatively close. Higher item level and Strength remain very valuable; sim close upgrades.
Protection is flexible with trinkets. Keep useful defensive alternatives available for encounters that demand extra survival.
Consecration is 30% larger. Enemies inside it become illuminated, increasing the chance for your abilities to critically strike them by 5%.
Enemies struck by Judgment or Blessed Hammer / Hammer of the Righteous take 20% additional Holy damage. A critical strike doubles that additional damage.
The Season 2 set is passive and rewards normal rotational play: keep Consecration active and continue prioritizing Judgment and your Hammer generator.